Table of Contents
Creating and Managing Permission Groups
Create Permission groups to control Knowledge Base access with read-only or full user permissions
Updated
by Taylor Sloane
Restricting articles to certain users starts with creating Permission Groups. You can assign multiple Permission Groups to each user and multiple Permission Groups to each article for flexible access control 🔒
Creating a Permission Group
- Head to Settings > Access
- Click Groups in the top bar
- Click Create Group in the top right
- Enter a name for the new permission group in the popout
- Click Save changes
Use descriptive names for your Permission Groups like "Product Team" or "Enterprise Customers" to easily identify them later.
Assigning Users to Permission Groups
Now that your Permission Group is set up, you can start assigning it to users. There are two ways to do this:
Owners and Administrators can't be assigned Permission Groups because they can see all articles by default
- Assign the Permission Group in Settings > Access > Members
- Assign the user group when inviting a new user
Permission Types
Permission Type | Capabilities |
Read-only | Users can view content but cannot edit articles |
Full-access | Users can both view and edit articles |
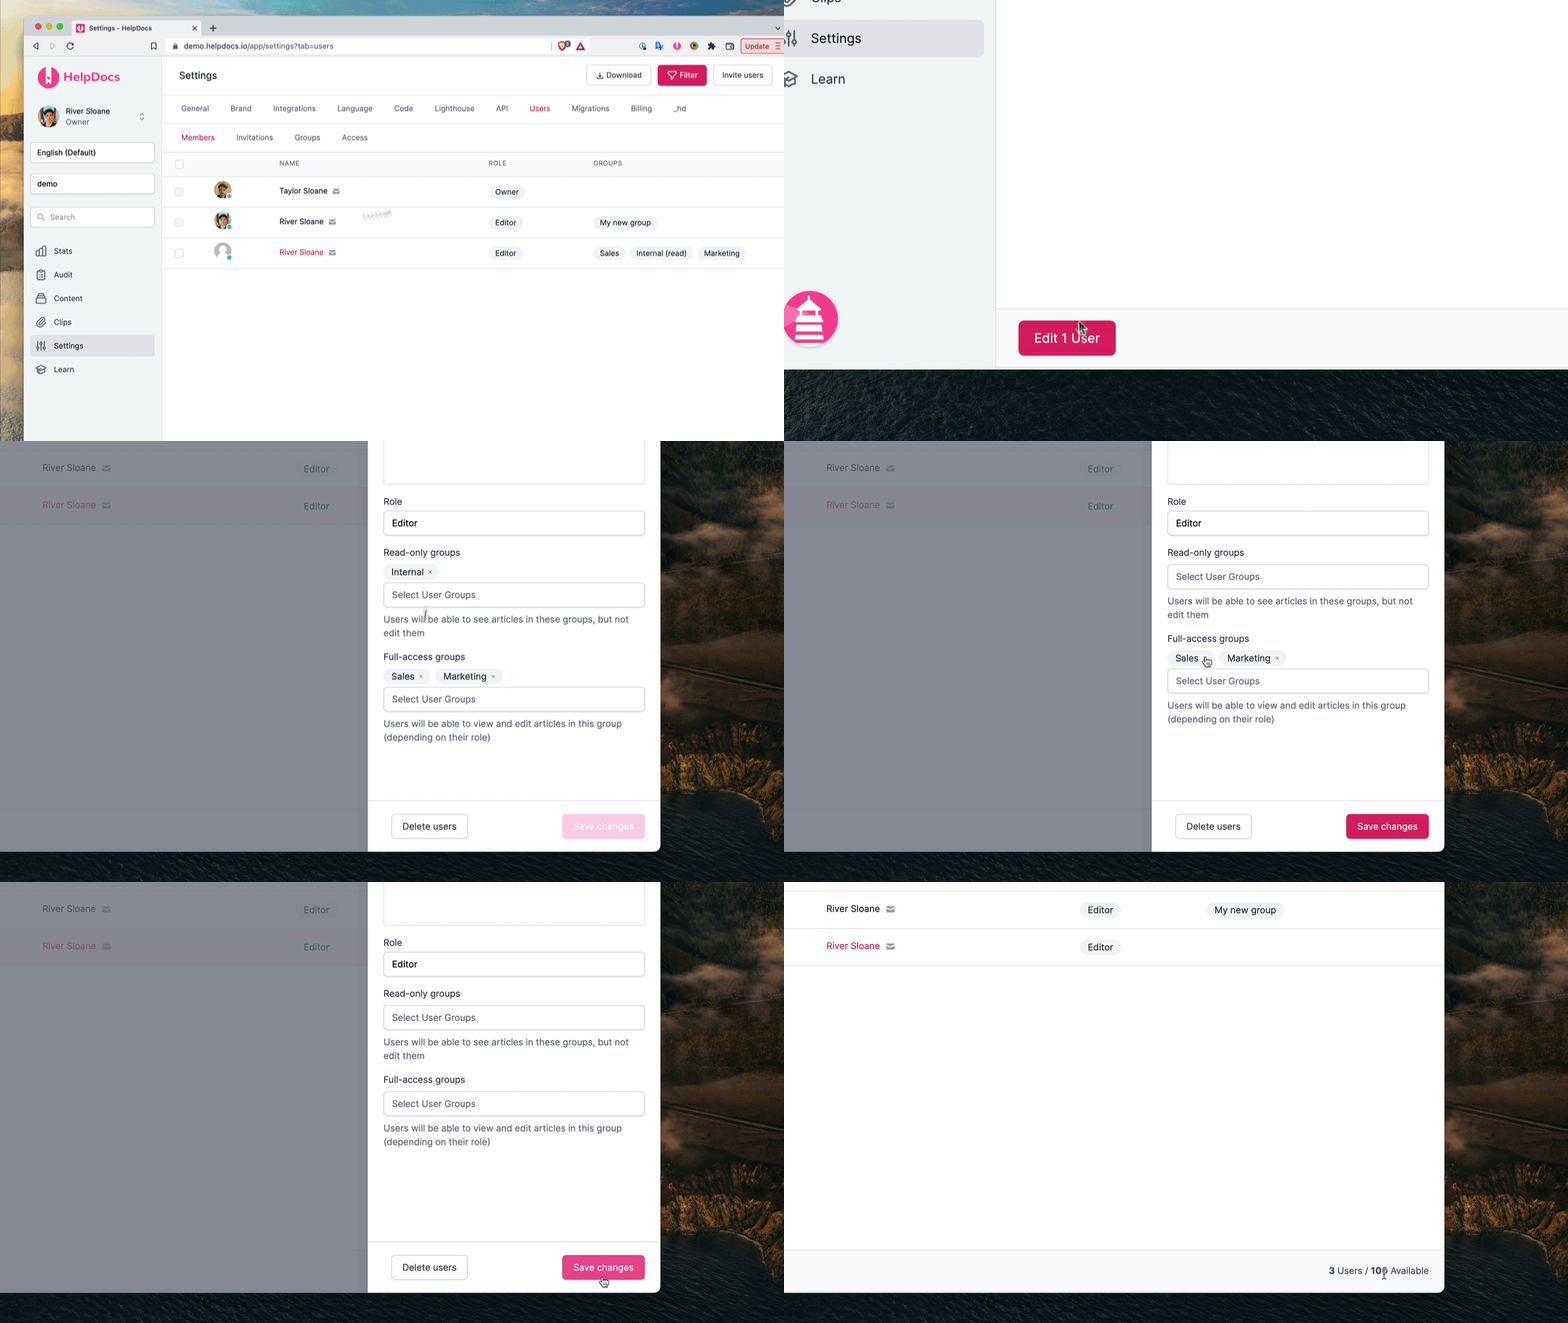
Removing Permission Groups from Users

- Head to Settings > Access > Members
- Select the user you'd like to edit
- Click Edit x User at the bottom of the user table
- Click the X on the permission group you want to remove
- Click Save changes
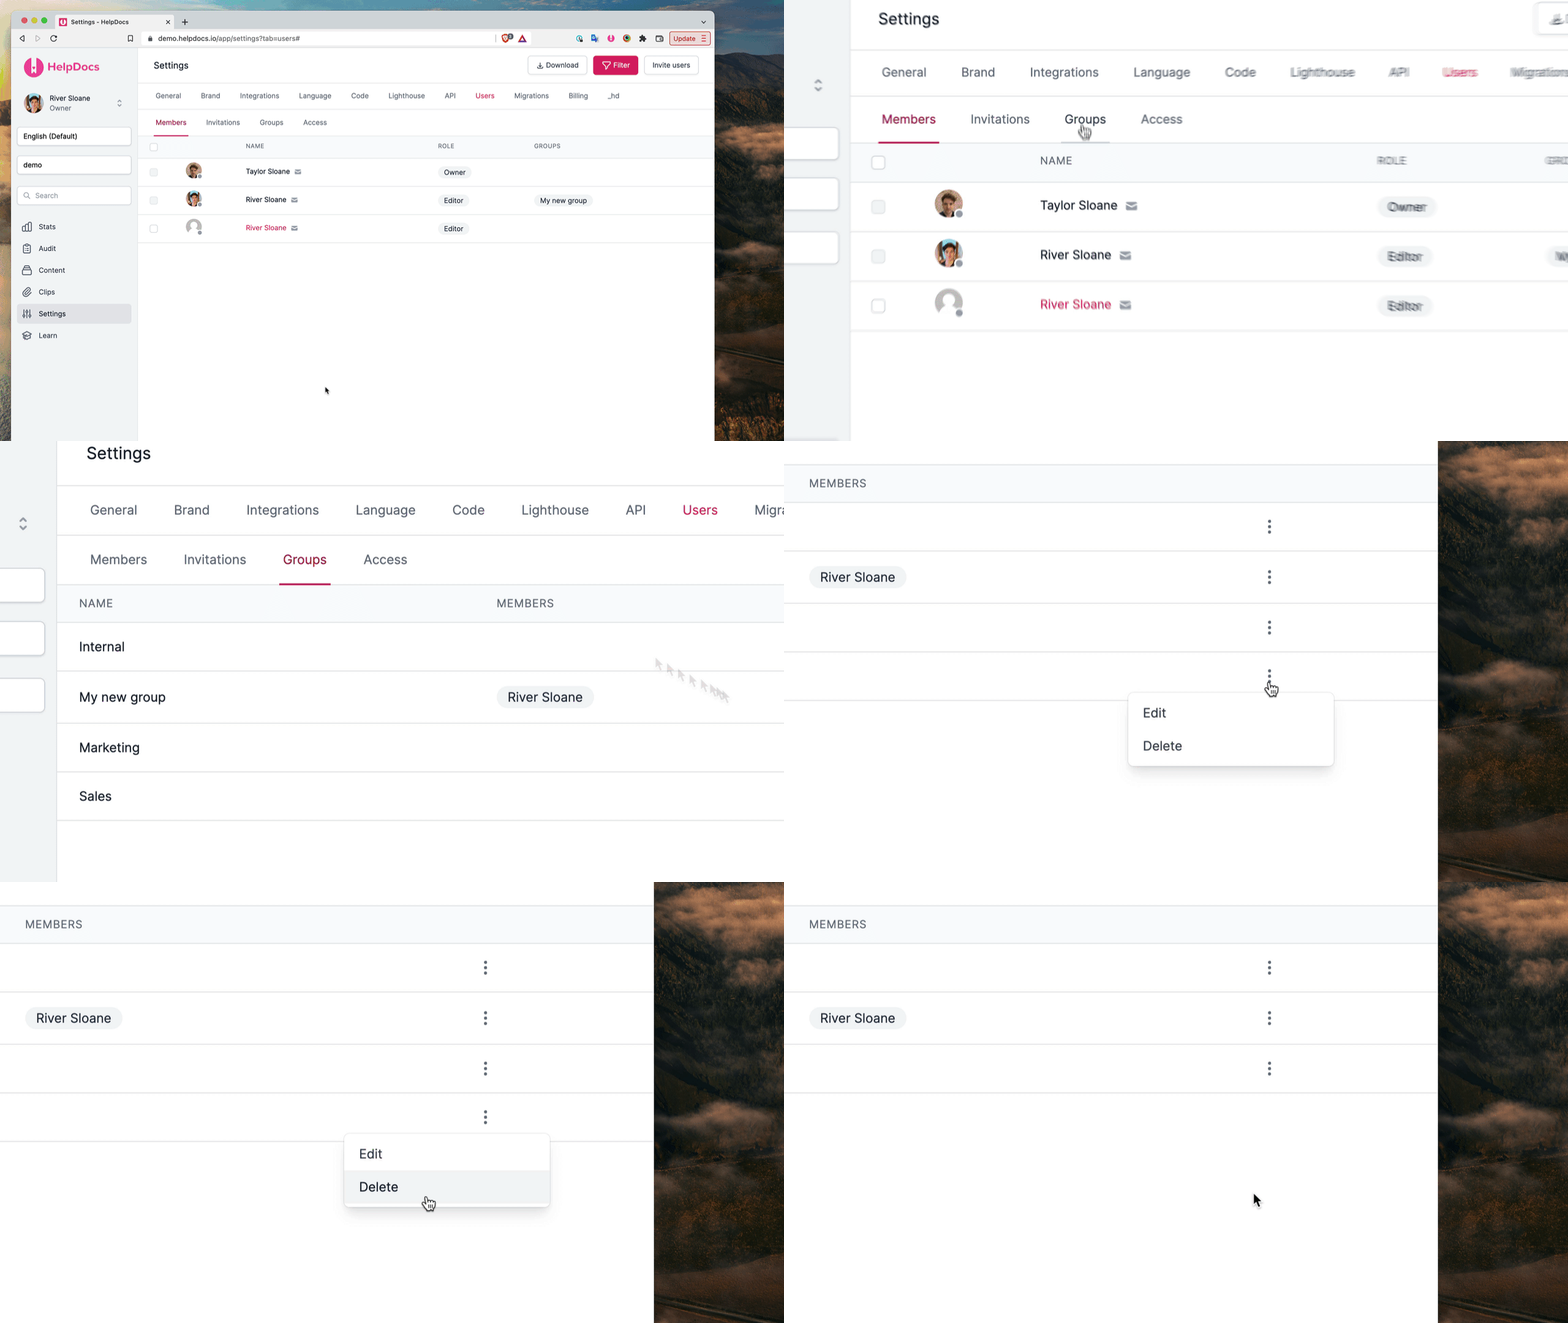
Deleting Permission Groups

- Head to Settings > Access
- Click Groups
- Find the group you want to delete
- Click ☰ More > Delete on the group row
Only Permission Groups without members assigned can be deleted. You'll need to remove all users from a group before you can delete it ✋
Keep your Permission Groups organized by regularly reviewing and removing unused groups—this makes managing your Knowledge Base access much easier in the long run.
What did you think of this doc?
Assigning Permission Groups to Articles