

The Block editor has tools for marking up screenshots, like arrows, boxes, highlights, and text. You can also show a screenshot inside a browser window. Both live on the toolbar that appears when you click an image, so we cover them together here.
Annotating an Image
- Click the image to show its toolbar
- Click Annotate image (the pen icon)
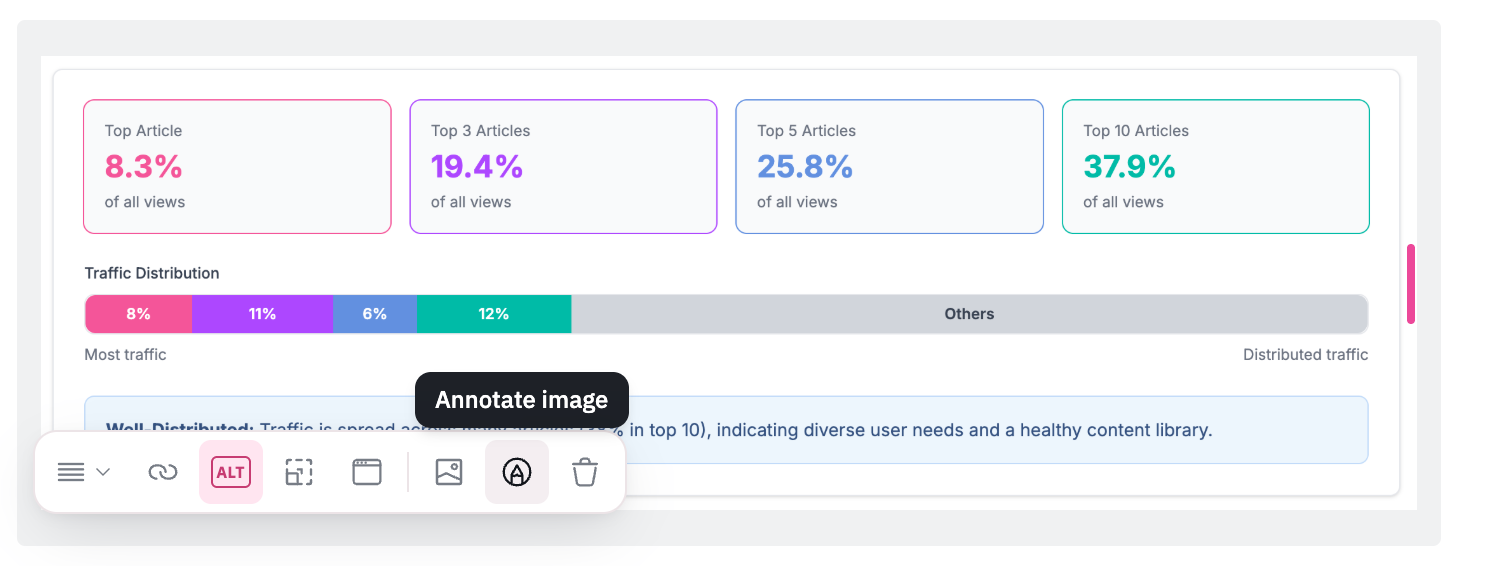
- Pick a tool and draw on the image
- Click Save
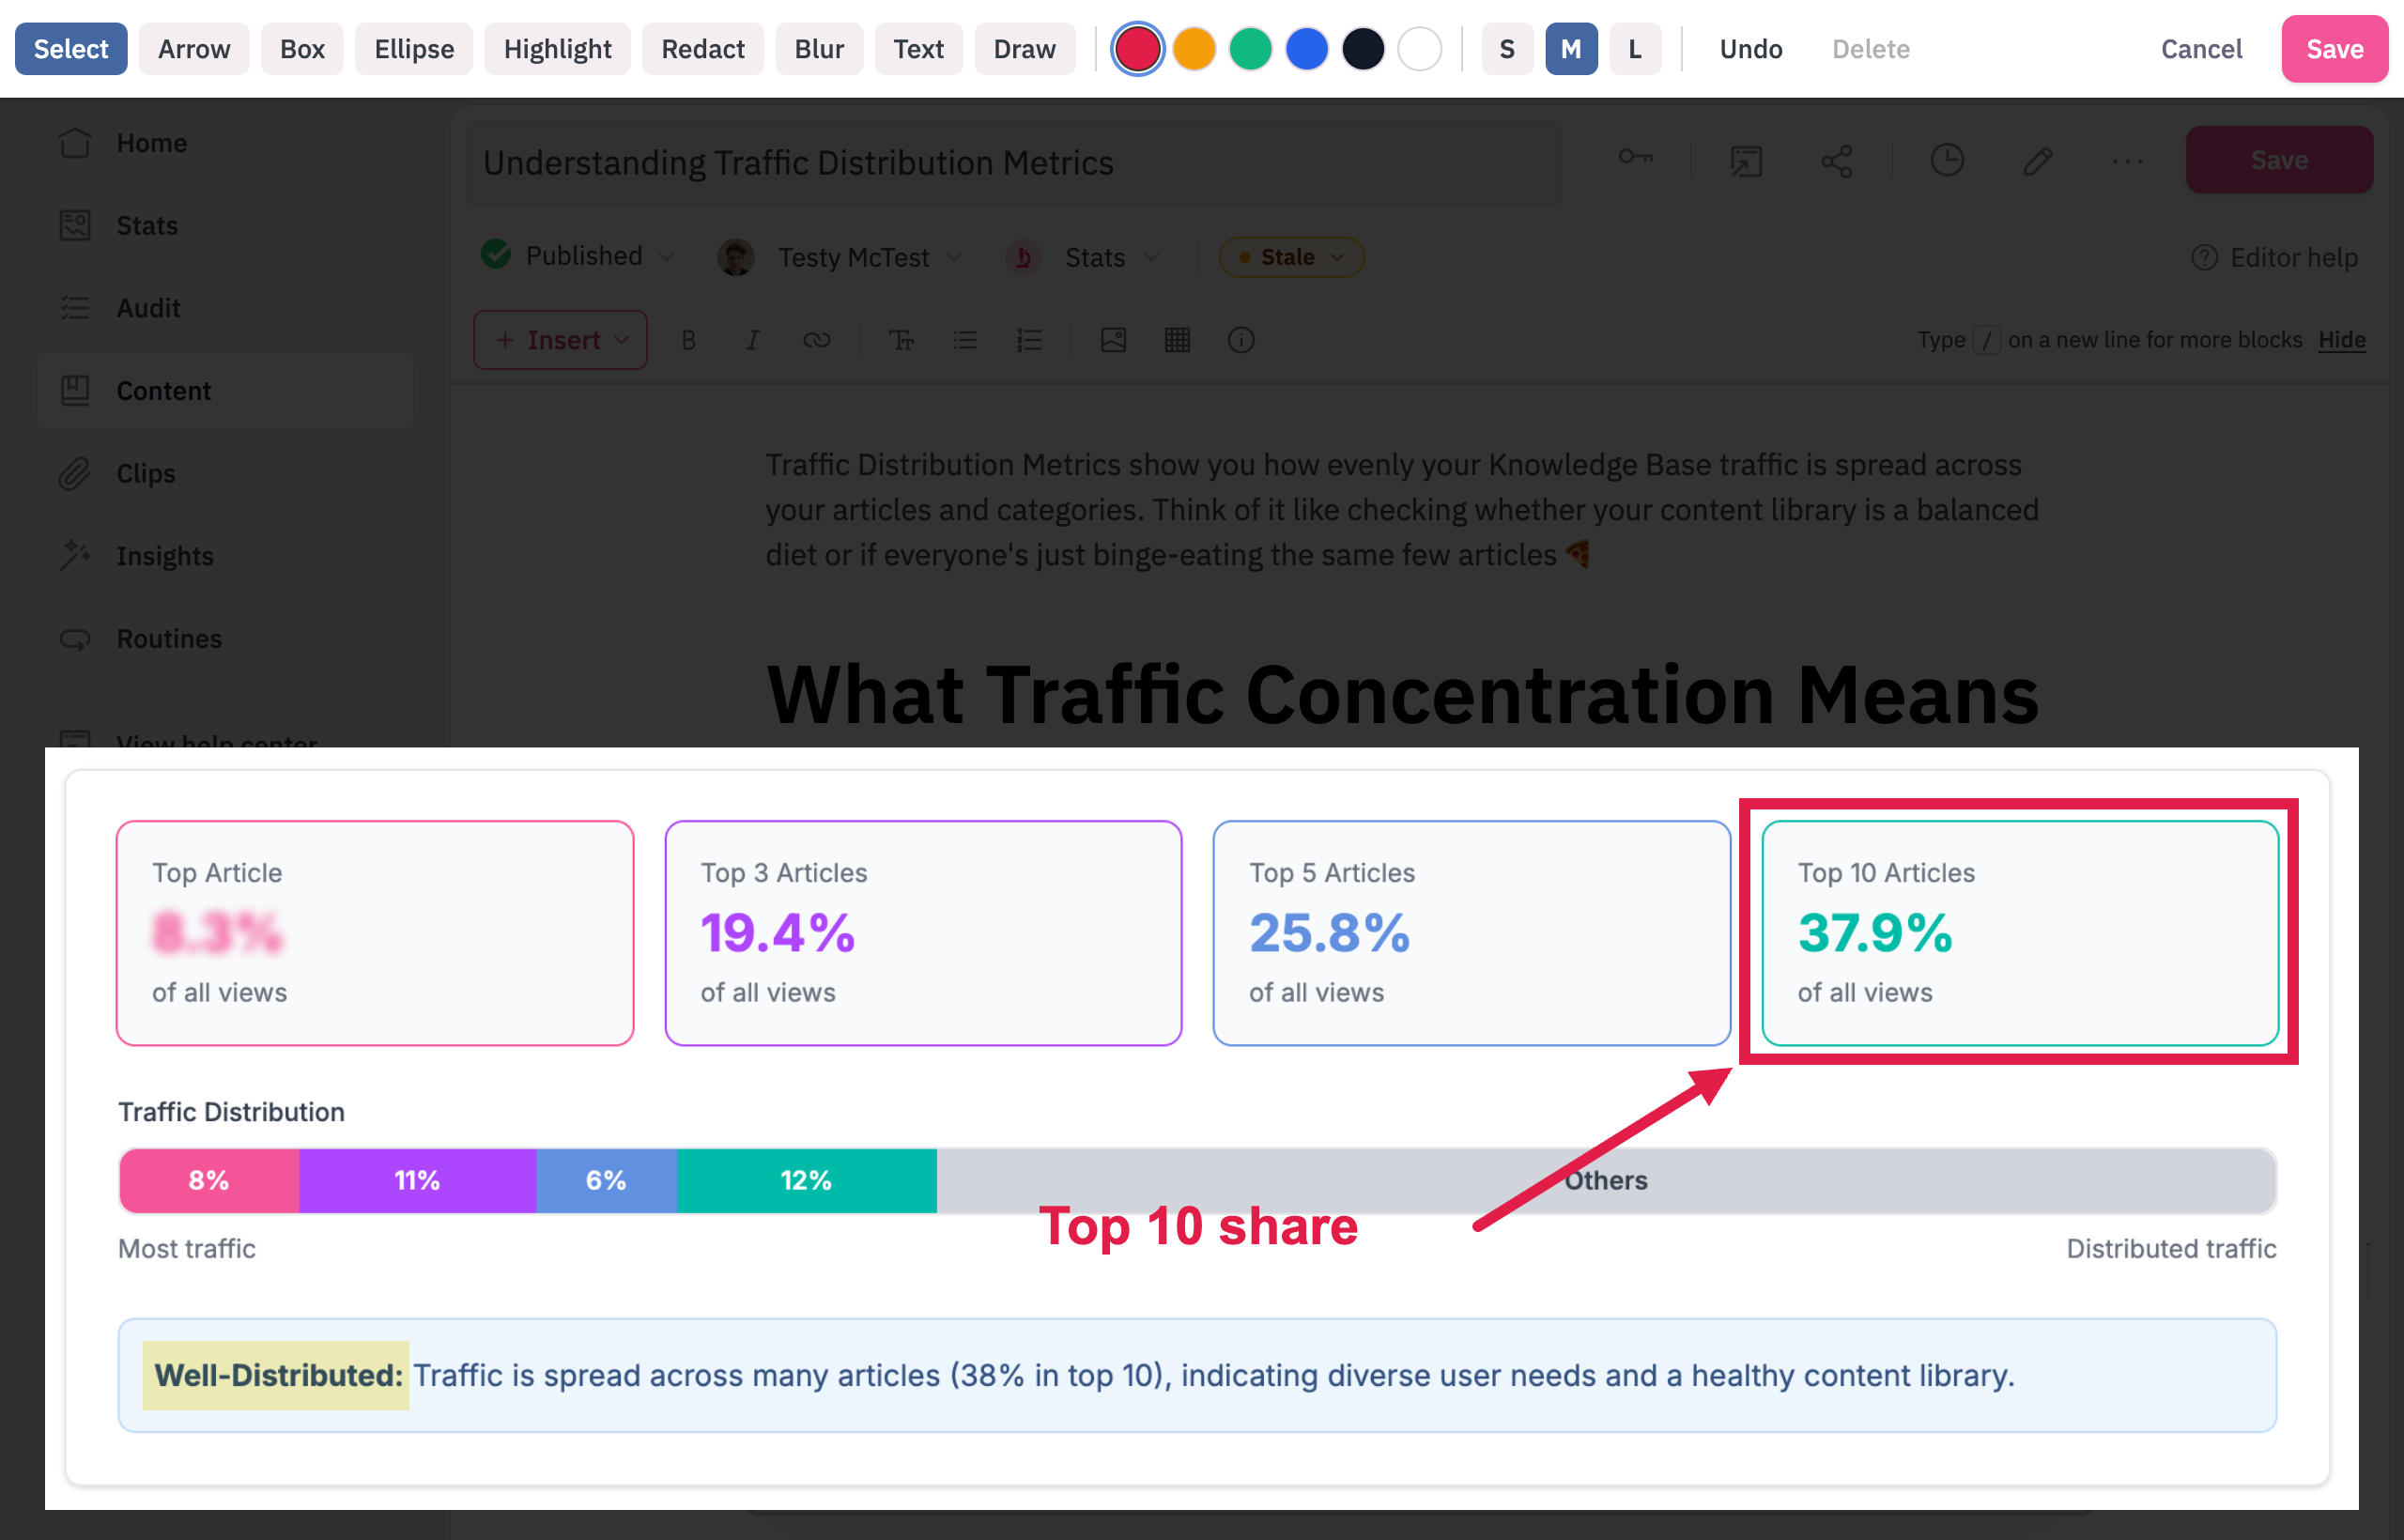
Annotation Tools
- Arrow: drag from where the arrow starts to where it points.
- Box: drag to draw a rectangle outline.
- Ellipse: drag to draw an oval or circle outline.
- Highlight: drag over an area to cover it in see-through yellow.
- Redact: drag to cover an area with a solid black box.
- Blur: drag over an area to blur it.
- Text: click where the text should go, type, then press Enter. Press Shift + Enter for a new line, or Escape to drop it.
- Draw: draw freehand.
- Select: click a shape to select it, then drag to move it. Boxes, ellipses, highlights, redactions, and blurs also get handles to resize them.
Pick a color and a stroke width (S, M, or L) before you draw. The colors are red, amber, green, blue, black, and white. Highlight is always yellow and Redact is always black.
Undo removes the last shape you added. Delete, or the Delete key, removes the selected shape. Cancel, or Escape, closes the editor without saving.
What Happens When You Save
Saving creates a new copy of the image with your annotations in it, and puts that copy in your article. The original file stays as it is. The copy keeps the original's size and sharpness.
The annotations become part of the new image, so you can't move or remove them later. To change them, replace the image with the original file and annotate it again.
A few more things to know:
- You can annotate images stored in HelpDocs. For an image linked from another website, upload a copy to HelpDocs first.
- Annotating a live screenshot stops it refreshing, because the next refresh would replace your annotations. The editor tells you this before you save.
- Annotating is part of the Block editor. In the Classic editor, see Editing Images.
Showing an Image in a Browser Window
A browser window frame draws a title bar around a screenshot, so readers can tell at a glance it's a web page.
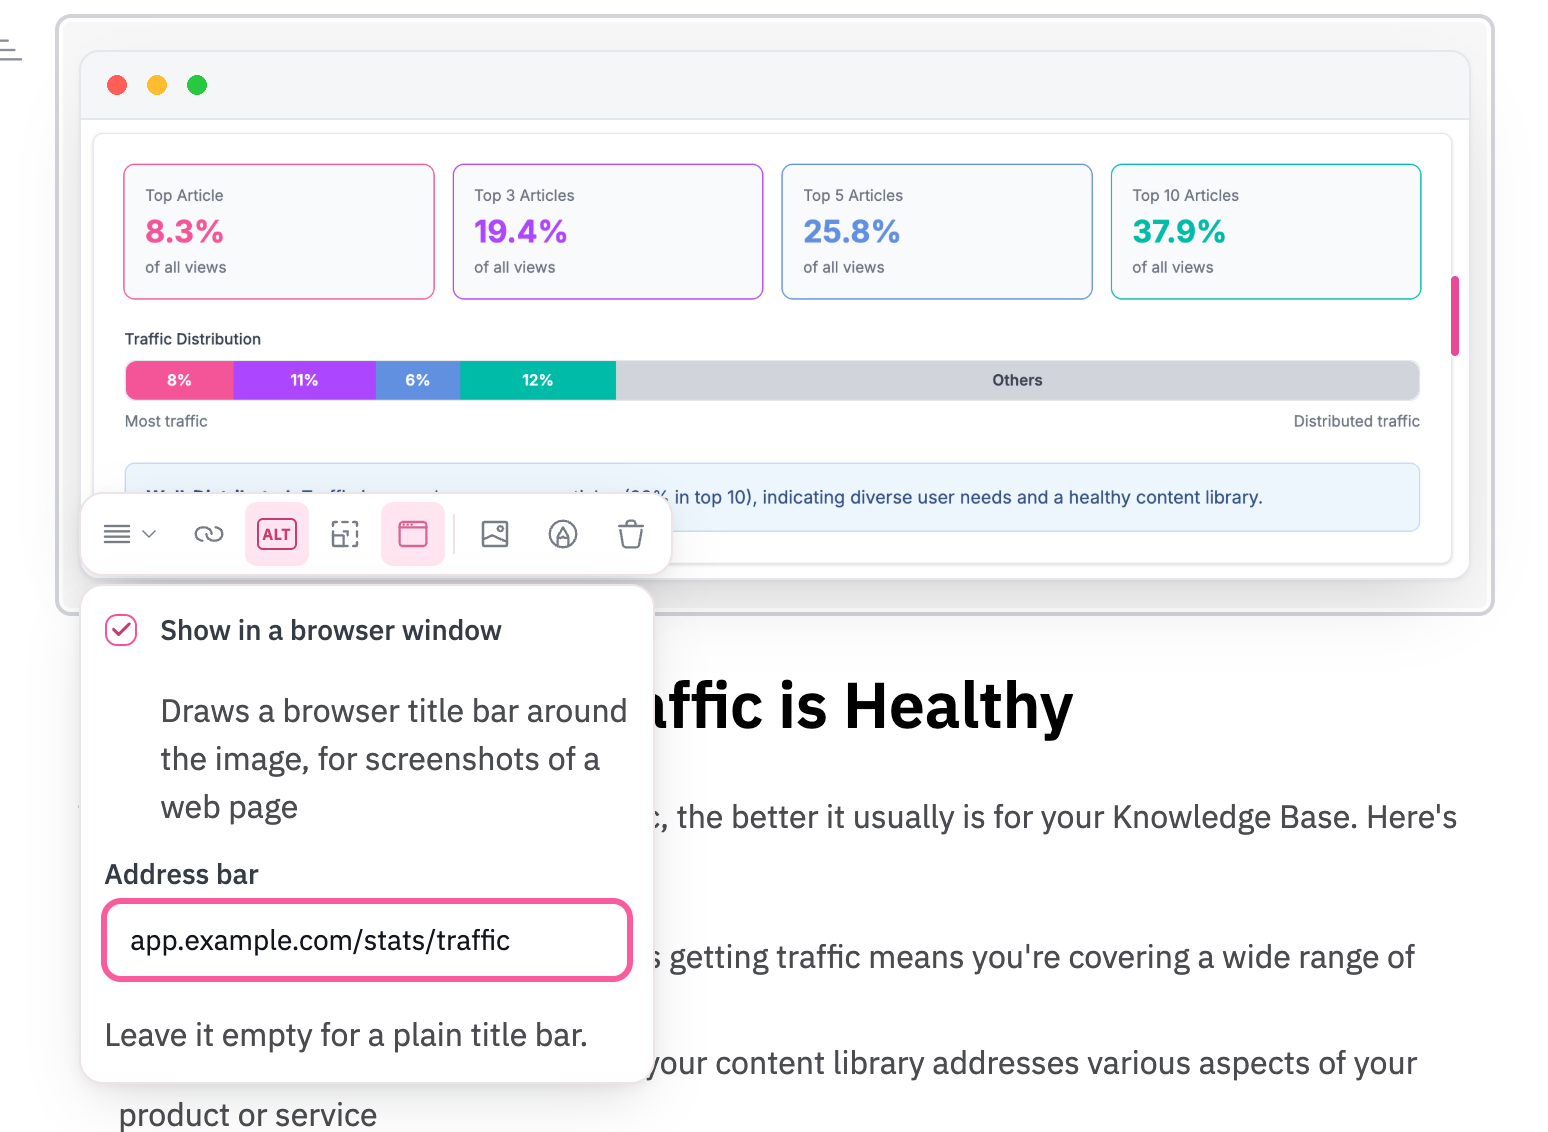
- Click the image to show its toolbar
- Click Browser window (the window icon)
- Tick Show in a browser window
- Optional: type an address in Address bar, then press Enter. Leave it empty for a plain title bar.
Here's how it looks in your article:
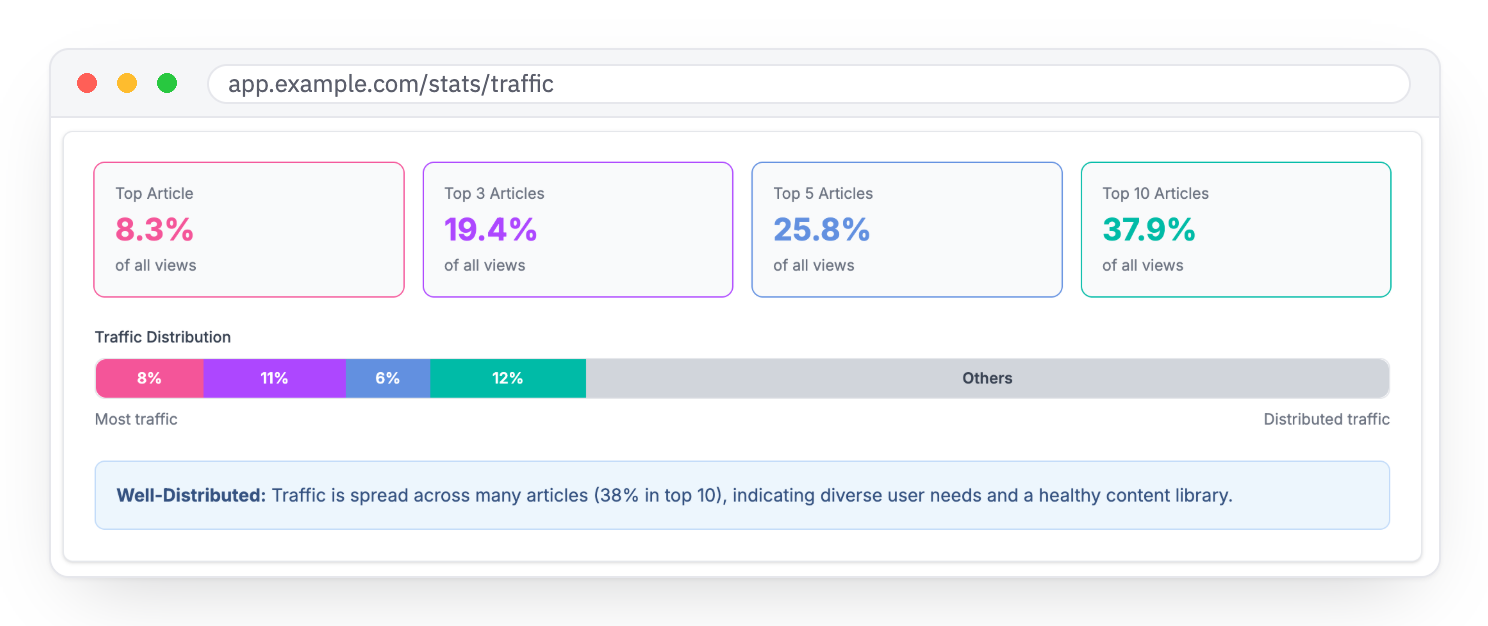
The address is only for show. It isn't a link, and readers can't click it. To add a link to the image, use Add link on the same toolbar.
To remove the frame, click Browser window and untick Show in a browser window.